Supplies:
- plain t-shirt (goodwill is where I found mine)
- scissors
- embellishments (optional)
- needle and thread (optional)
Start out with a plain t-shirt.
Cut top off (under armpits) and also cut off the bottom hem.
Cut approx. 1'' strips
Stretch each strip. No need to be gentle ;)
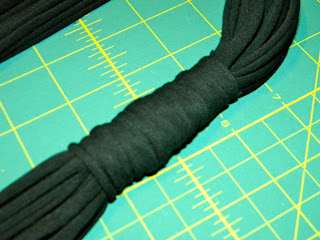
Gather together all of your strips except one and stagger them. That way when you wrap the remaining piece to hide the seams it won't be so bulky. I started at one end wrapping and when I got to the other side I tied off into one of the strings and tucked it up into the already wrapped part. You can choose to wrap yours however you wish and you think is easiest (tie, glue, sew, ect.)
What mine looked like with the seams wrapped and hidden.
You could add some texture by adding a braid.
Or add an embellishment to dress it up.
The grey scarf I did a little different. Since this grey shirt didn't have any seams on either side what I did was cut approx. 1'' strips but leaving about an 1'' uncut at the end. See picture below. You can decide to either leave the uncut part visible or you could wrap the uncut part. Your choice.
If you decide you are going to wrap them you need to make sure and cut an extra strip off. Stretch each one out like the instructions above. In this scarf I cut an extra strip off because I wanted to add a braid. So what I did was tied it into two strings and started braiding until I got to the other side of where your "seam" would be and tied it off again. You don't see the ties because I then wrapped another strip around. You can see where I wrapped this one in the first picture.
Please let me know if you have any questions on how I did anything.
Enjoy! See you tomorrow :)


No comments:
Post a Comment